admin

Agent Workflow Configuration in NICE CXone diagram showing Agent Workspace UI triggering workflow configuration, workflow execute action, CRM integration with Salesforce and ServiceNow, and data returned to agent workspace

Agent Workflow Configuration in NICE CXone (Detailed Guide)

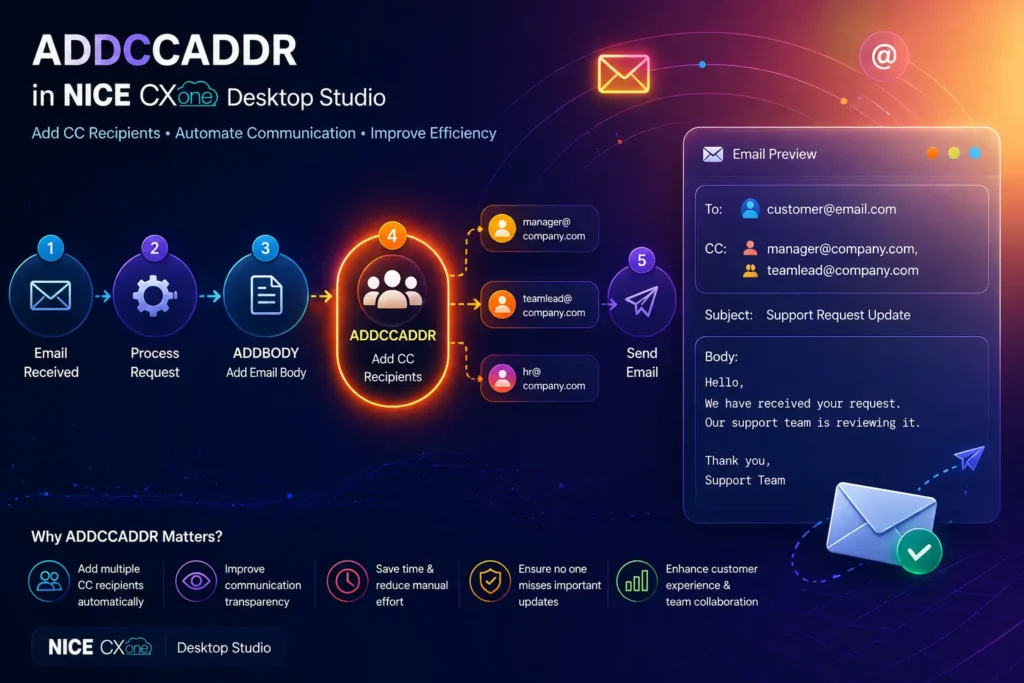
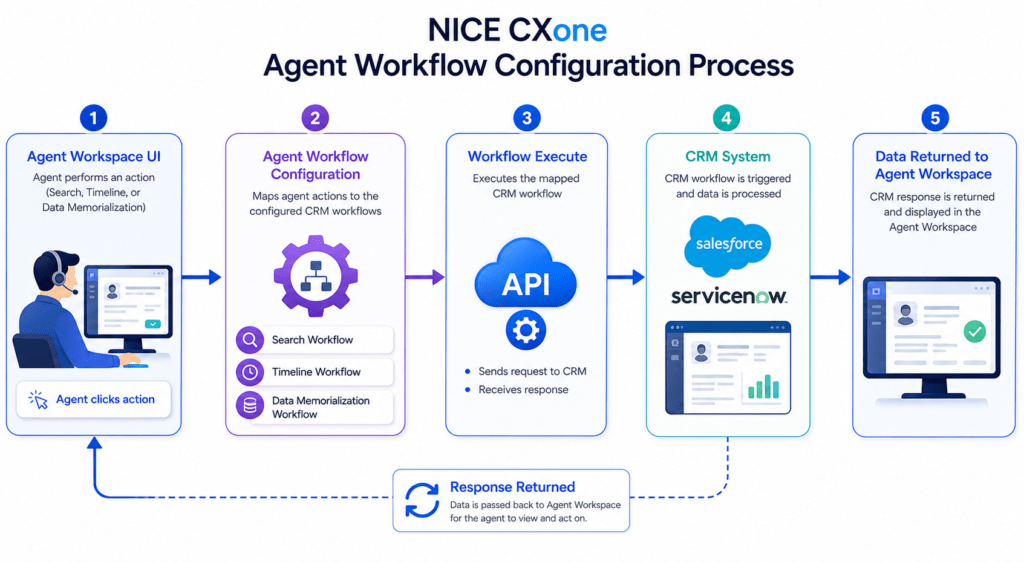
Agent Workflow Configuration in NICE CXone Agent Workflow Configuration is a key action in NICE CXone Desktop Studio used to connect your CRM workflows with the Agent Workspace. In simple terms: It tells the system“When an agent performs an action → trigger this CRM workflow.” This is essential when integrating platforms like Salesforce, ServiceNow, or any CRM with NICE CXone. Why This Action is Important Without this configuration: Agents cannot trigger CRM workflowsCustomer data won’t sync properlyAutomation inside Agent Workspace won’t work With it: Agents get real-time CRM dataAutomation reduces manual workCustomer experience improves What Agents Can Do Using This This action enables 3 major agent activities: 1️. Search (Second-Level Search) Agent clicks Refresh/Search Gets more detailed customer data 2️. Add Timeline Activity Agent logs interaction into CRM Example: “Customer called regarding billing issue” 3️. Data Memorialization (ACD Data Mapping) Stores call/chat data into CRM fields Example: Call duration Agent ID Queue name High-Level Workflow Diagram Here’s how everything connects: Agent Action (Workspace)         ↓ Agent Workflow Configuration         ↓ Workflow Execute Action         ↓ CRM Workflow Triggered         ↓ CRM (Salesforce / ServiceNow)         ↓ Data Displayed Back in Agent Workspace Where to Find It in Studio Location: Framework Tab → Agent Workflow Configuration Dependencies Before using this action, ensure: Agent Application Agents must use one of: Agent Workspace (Desktop) Agent Workspace (Browser Extension) Agent for Microsoft Teams CRM Integration Setup Must be configured in Agent Integrations page At least one workflow must exist Login Requirement To use the wizard:Login using CXone username & password Session ID login → Wizard won’t open Required Pairing You MUST use: Agent Workflow Configuration             + Agent Workflow Execute These two always work together. Script Type Support Phone ScriptsDigital Scripts (Chat, Email, etc.) Input Properties Caption Label for your action Example: CRM Workflow Setup AgentUserID Important difference: Script Type Format Phone {__AgentID} Digital {AgentID} Wrong format = data won’t show in UI SearchWorkflow Workflow used when agent performs search TimelineWorkflow Workflow used when agent logs activity DataMemorializationWorkflow Workflow used to store ACD data in CRM SearchCacheKey Used to pass search results from: Workflow Execute → Agent Workspace Leave empty if using Custom Event instead of cache SearchInput Dynamic search field (configured in wizard) Example: phone number, email, customer ID Workflow Configuration Diagram +——————————+ | Agent Workflow Configuration | +——————————+         |       |       |         ↓       ↓       ↓    Search   Timeline   DataSave Flow      Flow       Flow         ↓       ↓       ↓      CRM Workflows (Mapped) Result Branch Conditions (Error Handling) These help your script handle different situations: Condition Meaning Default Normal path Success Everything worked InvalidAgentId Agent ID incorrect AgentNotConnected Agent offline InvalidWorkflowConfigData Wrong config Branching Diagram           Action Executes                  ↓       ——————-         |                |          |      Success  Error   Invalid         |                |          |      Continue  Retry   Alert Configuration Wizard (Step-by-Step) Step 1: Open Wizard Double-click the action Step 2: Select CRM Configuration Choose integration (e.g., Salesforce) Step 3: Select Agent Actions ✔ Search✔ Timeline✔ Data Memorialization Step 4: Map Workflows Example: Action Workflow Search Customer Lookup Timeline Case Notes Update Data Save Call Details Step 5: Save Configuration Click SaveProperties auto-fill Full Integration Flow Diagram [Customer Interaction]         ↓ [Agent Workspace UI]         ↓ (Agent clicks action)         ↓ [Agent Workflow Configuration]         ↓ [Workflow Execute]         ↓ [CRM API Call]         ↓ [CRM System]         ↓ [Response Returned]         ↓ [Displayed in Agent Workspace] Example Use Case Scenario: Customer Calls Support Agent receives call Clicks Search Customer data loads from CRM Agent handles issue Adds note (Timeline) Call details saved automatically Best Practices Always match same CRM config in both actionsUse correct AgentID formatTest workflows before productionKeep cache key clean unless neededHandle error branches properly Common Mistakes Using {__AgentID} in digital scriptNot linking Workflow ExecuteNo CRM workflow configuredWrong mapping in wizard Final Summary Agent Workflow Configuration = Bridge between Agent + CRM It allows: Smart data retrieval  Activity logging  Automated data storage  When combined with Workflow Execute, it creates a fully automated CRM integration inside NICE CXone Training.

Agent Workflow Configuration in NICE CXone (Detailed Guide) Read More »

Agent Assist in NICE CXone showing AI-powered customer support workflow with real-time suggestions and analytics dashboard

Agent Assist in NICE CXone – Complete Guide with Examples & Workflow

Introduction to Agent Assist NICE CXone Agent Assist is an advanced feature that helps agents during live customer interactions. It uses AI-powered tools to provide: Real-time suggestions Knowledge base articles FAQs and responses Interaction summaries This improves agent performance, customer satisfaction, and response speed. What is Agent Assist? Agent Assist connects external AI applications to the CXone platform. These applications analyze conversations and provide real-time guidance to agents. Key Benefits: Faster response handling Reduced agent effort Improved accuracy Better customer experience How Agent Assist Works Workflow Explanation: Customer initiates interaction (call/chat/email) Agent answers the interaction Agent Assist gets triggered AI analyzes conversation in real-time Suggestions & insights are displayed to the agent Dependencies of Agent Assist Action Agent Assist must be placed correctly in the script to work. Important Rules: Must be used after OnAnswer (voice) or OnAssignment (digital) Requires Agent ID Multiple Agent Assist actions can be used in one script Each application needs its own configuration If not configured properly, features like transcripts and summaries won’t work Supported Script Types Agent Assist supports multiple interaction channels: Voice (Phone) Chat Email SMS Digital interactions Work items This makes it a multi-channel AI assistant Supported Agent Assist Applications Popular Integrations: AutoSummary – Generates call summaries Copilot for Agents – Suggests replies Real-Time Interaction Guidance (RTIG) – Guides agent behavior Voice Biometrics – Verifies customer identity Google Contact Center AI – Provides FAQs and knowledge Salesforce Assist – Shows transcripts These tools make interactions smarter and faster Input Properties Explained Caption Short label for identifying the action in the script assistLaunchConfigName Defines which AI application is connected scriptParams JSON data passed to the AI system Important:You must define parameters using a Snippet action Result Branch Conditions Agent Assist supports branching logic: Default → Normal execution path OnError → Triggered when something fails Errors are stored in _ERR variable Required Snippet Example To pass data, you must use a Snippet action: {  “customerName”: “John”,  “issueType”: “Billing”,  “priority”: “High”} This helps AI tools understand the context better. How to Configure Agent Assist (Step-by-Step) Open your script in Studio Add Agent Assist action Open Agent Assist Hub Select your AI application Assign configuration profile Save and test Real-Time Use Case Example Scenario: Customer asks about billing issue: AI detects keywords Suggests relevant FAQ Provides response template Agent responds instantly Result: Faster resolution + better CX Conclusion Agent Assist in NICE CXone is a powerful AI-driven feature that transforms customer interactions. By integrating intelligent tools, businesses can deliver faster, smarter, and more efficient support-NICE CXone Training.

Agent Assist in NICE CXone – Complete Guide with Examples & Workflow Read More »

ADDTOADDR in NICE CXone Desktop Studio workflow diagram showing Createemail and email recipient automation process

ADDTOADDR in NICE CXone Desktop Studio – Complete Guide

Introduction In contact center automation, sending emails to the right recipients is critical.ADDTOADDR in NICE CXone Desktop Studio is an important action that helps you define who will receive the email in your workflow. It works along with the Createemail action and allows you to add one or multiple recipients to your email script. What is ADDTOADDR? ADDTOADDR is an action used to add recipient email addresses to the structured variable created using Createemail. Simple meaning:It decides “who should receive the email” Why ADDTOADDR is Important Using ADDTOADDR, you can: Send emails to the correct recipients Add multiple users dynamically Build automated email workflows Improve communication accuracy Enable scalable email automation Where ADDTOADDR is Used Email automation scripts Customer support workflows Ticketing systems Notification systems Contact center email routing Supported Script Type Email scripts only Make sure your script is Email type before using this action. How ADDTOADDR Works (Step-by-Step) Email script is triggered Createemail action creates a structured variable ADDTOADDR adds recipient email address Email is processed Message is sent to recipient(s) Think of it like adding people to the “To” field in an email. Workflow Diagram [Start Script]      ↓[Createemail Action]      ↓[ADDTOADDR Action] (Add Recipient Email)      ↓[Optional: ADDCCADDR / ADDFROMADDR]      ↓[Send Email]      ↓[End] Input Properties Explained  1.Caption Custom name for the action Helps identify in script canvas Example: Add Customer Email 2. ContainerVar Stores all email data Default value: EML Contains: To From Subject Body 3. Recipient Email address of receiverExample: customer@gmail.com support@company.com 4. Replace (True/False) False (default) → Adds to existing list True → Replaces existing recipients Use case: Multiple recipients → False Single fixed recipient → True Result Branch Conditions Default Branch Normal execution path Used if no other condition exists Ensures smooth workflow continuation Practical Example Scenario: Support Email System Goal: Send email to customer Flow: Customer raises ticket Email script starts Createemail initializes ADDTOADDR adds: customer email Email sent Result: Correct recipient Automated response Better customer experience When to Use ADDTOADDR When sending emails to usersWhen adding multiple recipientsWhen building automation workflows When NOT to Use Not needed for non-email scriptsNot needed for temporary variablesAvoid if recipient is fixed elsewhere ADDTOADDR vs Other Actions Feature ADDTOADDR ADDCCADDR ADDFROMADDR Adds Recipient Yes Yes (CC) No Sets Sender No No Yes Email Field To CC From Learn with NICE CXone Training If you want to master actions like ADDTOADDR and build real-time automation workflows, NICE CXone training is essential. With professional training, you will learn: End-to-end email scripting in NICE CXone Real-time workflow design (Createemail, ADDTOADDR, Sendemail) Contact center automation strategies Hands-on practical scenarios and use cases At VoIP Trainers, you get: 100% practical training Real-time project experience Expert guidance from industry professionals Online & classroom sessions in Chennai Conclusion ADDTOADDR in NICE CXone Desktop Studio is a simple but powerful action that ensures your emails reach the right recipients at the right time. By combining it with Createemail and other email actions, you can build fully automated, scalable, and accurate communication workflows for your contact center. When used correctly—with proper configuration of Recipient, ContainerVar, and Replace—you can avoid errors, improve response time, and deliver a better customer experience.

ADDTOADDR in NICE CXone Desktop Studio – Complete Guide Read More »

ADDFROMADDR in NICE CXone Desktop Studio used to set the from address in email automation workflows for contact center communication

ADDFROMADDR in NICE CXone Desktop Studio: Complete Guide

In modern contact centers, email automation plays a vital role in ensuring smooth communication with customers. One of the essential actions used in email scripting is ADDFROMADDR in NICE CXone Desktop Studio. This action helps define the sender’s email address in automated email workflows, making your communication more structured and professional. What is ADDFROMADDR in NICE CXone Desktop Studio? ADDFROMADDR is an action used in NICE CXone Desktop Studio to add or set the “From” email address in an email message. It works with structured variables created using the Createemail action. In simple terms:It tells the system who the email is being sent from. Why ADDFROMADDR is Important Setting the correct sender address is crucial in business communication. Using ADDFROMADDR in NICE CXone Desktop Studio helps you: Ensure emails come from the correct department or agent Maintain brand identity and professionalism Avoid email delivery issues or spam flags Enable better reply handling from customers Improve trust and communication clarity Where ADDFROMADDR is Used This action is mainly used in: Email automation scripts Customer support workflows Notification systems Helpdesk and ticketing integrations Outbound email communication Supported Script Types Currently, ADDFROMADDR supports: Email scripts only Make sure your script type is set to Email before using this action. How ADDFROMADDR Works Here’s a simple workflow: An email script is triggered A Createemail action creates a structured variable ADDFROMADDR is used to define the sender address The email is processed and sent to the customer Think of it like assigning a sender name before sending a message Input Properties of ADDFROMADDR Understanding the properties helps you use the action effectively: Caption A custom label for the action Appears on the script canvas Helps identify the action easily ContainerVar The structured variable that holds email data Default value: EML Stores all email-related fields like To, From, Subject, etc. Address The email address that appears in the From field Example: support@company.com This is what the customer sees as the sender Replace A boolean value (True/False) False (default): Appends to existing sender list True: Replaces the existing sender Use this carefully to control how sender data is handled. Result Branch Conditions Branch conditions control what happens after the action runs. Default Branch The standard execution path Used when no other conditions are defined Ensures smooth script continuation In most cases, only the Default branch is used with ADDFROMADDR. Practical Example Scenario: Customer Support Email A company wants all support emails to come from a dedicated support address. Script Flow: Customer submits a request Email script is triggered Createemail action initializes email structure ADDFROMADDR sets: support@company.com as sender Email is sent to the customer Result: Consistent sender identity Professional communication Better response management When to Use ADDFROMADDR Use this action when: You need to define a sender email address You are building automated email workflows You want consistent branding in emails You need control over outgoing email identity When NOT to Use ADDFROMADDR Avoid using it when: You are not working with email scripts The sender address is already predefined elsewhere You don’t need to modify the From field Best Practices To get the best results: Use valid and active email addresses Maintain consistent naming conventions Avoid unnecessary replacements Test email delivery before deployment Align sender address with business purpose Key Limitations Works only with Email script type Requires Createemail action beforehand Misconfiguration can affect email delivery ADDFROMADDR vs Other Email Actions Feature ADDFROMADDR ADDTOADDR ADDCCADDR Sets Sender Yes No No Adds Recipient No Yes Yes Email Control Medium High Medium Usage From field To field CC field Conclusion ADDFROMADDR in NICE CXone Desktop Studio is a simple yet powerful action that ensures your emails have the correct sender identity. It plays a key role in maintaining professional communication, improving customer trust, and managing automated email workflows effectively. By using this action correctly, you can build structured and reliable email automation systems within your contact center-VoipTrainers

ADDFROMADDR in NICE CXone Desktop Studio: Complete Guide Read More »

ADDCFR in NICE CXone Desktop Studio action used to append call field records for billing and reporting

ADDCFR in NICE CXone Desktop Studio – Complete Guide for Beginners

What is ADDCFR in NICE CXone? ADDCFR is an action in NICE CXone Desktop Studio that allows you to append data to Call Field Records (CFRs). These CFRs are part of long-distance call records and can be downloaded for billing, reporting, and auditing purposes. In simple terms:ADDCFR helps you store additional data into call records for tracking and billing. Why ADDCFR is Important In contact center environments, especially for long-distance billing, capturing extra call details is critical. Using ADDCFR, you can: Add custom values to call records Track specific call-related information Improve reporting and billing accuracy Enable detailed auditing Where ADDCFR is Used ADDCFR is mainly used in: Email scripts (currently supported script type) Billing-related workflows Reporting and analytics setups Call tracking systems Important:ADDCFR is not available in the new Studio (Controlled Release) yet. It is only available in Desktop Studio. How ADDCFR Works Here’s a simple flow: A script executes during a customer interaction ADDCFR action is triggered A value is appended to the Call Field Record The data becomes part of the call log It can later be downloaded for billing/reporting Think of it like adding notes to a call record for future use. Supported Script Types Currently, ADDCFR supports: Email scripts only Make sure your script type matches before using this action Input Properties of ADDCFR Caption A custom name for the action Appears on the script canvas Helps identify the action easily CfrValue The actual value that will be added to the CFR Can include: Static values Variables Dynamic data Example: Customer ID Transaction ID Call category Support case number Result Branch Conditions Result branch conditions help control the flow after ADDCFR executes. Default Branch This is the standard execution path Used when no other conditions are defined Ensures the script continues smoothly In most cases, ADDCFR uses only the Default branch. Practical Example Scenario: Email Support Tracking A company wants to track email interactions for billing and reporting. Script Flow: Customer sends an email Script processes the request ADDCFR is triggered The system appends: Customer ID Issue type Ticket number Result: Data is stored in Call Field Records Reports can be generated later Billing becomes more accurate When to Use ADDCFR Use ADDCFR when: You need to store extra call or interaction data You want better billing tracking You are building reporting workflows You need custom data inside call records When NOT to Use ADDCFR Avoid ADDCFR if: You don’t need billing or reporting data You are using unsupported script types You only need temporary variables (use script variables instead) Best Practices Use meaningful CfrValue names Avoid unnecessary data to keep records clean Ensure values are properly formatted Test before deploying in production Use consistent naming conventions Key Limitations Only works with Email script type Not available in new Studio (CR version) Requires proper configuration for reporting ADDCFR vs Other Data Methods Feature ADDCFR Variables Database Persistent Data ✅ Yes ❌ No ✅ Yes Billing Usage ✅ Yes ❌ No ❌ No Reporting Ready ✅ Yes ❌ No ✅ Yes Complexity Low Low High Conclusion ADDCFR in NICE CXone Desktop Studio is a powerful action for capturing and storing important call data. It plays a key role in: Billing systems Reporting workflows Data tracking By using ADDCFR correctly, you can improve: Data accuracy Operational insights Customer interaction tracking-Voip Trainers Book your appointment.

ADDCFR in NICE CXone Desktop Studio – Complete Guide for Beginners Read More »

Addccaddr in nice cxone desktop studio showing email CC automation workflow with scripting interface

Mastering ADDCCADDR in NICE CXone Desktop Studio for Email Automation

Introduction If you are learning through nice cxone training, understanding ADDCCADDR is essential In modern contact centers, email automation is essential for efficient communication and workflow management. Tools like NICE CXone Desktop Studio allow businesses to automate emails with precision. One important action used in email scripting is ADDCCADDR. If you’re new, you might be wondering: What is ADDCCADDR? Why is CC important in automation? How does it work in NICE CXone? This guide explains everything in a simple and practical way. What is ADDCCADDR in NICE CXone? ADDCCADDR is an action used in email scripts to add CC (Carbon Copy) recipients to an email. In simple terms:It allows you to send a copy of the same email to additional people automatically. What Does “CC” Mean? CC stands for Carbon Copy. When you add someone in CC: They receive the same email All recipients can see each other’s email addresses Example: To: Customer CC: Manager, Team Lead Why ADDCCADDR is Important Without ADDCCADDR, you cannot automatically include additional stakeholders in your emails. Key Benefits: Automatically notify managers or teams Keep multiple people informed Improve transparency in communication Reduce manual work Ensure no one misses important emails How ADDCCADDR Works Before using ADDCCADDR, you must first create an email structure using: CreateEmail action Then ADDCCADDR adds CC recipients to that email Basic Email Workflow Here’s a simple automation flow: Create Email → (CreateEmail) Add Subject → (AddSubject) Add Body → (ADDBODY) Add CC → (ADDCCADDR) Send Email → (SendEmail) Visual Workflow Concept This is how CC recipients are added in a structured automation workflow. ADDCCADDR Input Properties Explained Let’s break down each property in simple terms: Caption A label for your action Helps identify it in the script Example:“Add Manager CC” ContainerVar Stores all email data Default value: EML Usually, you don’t need to change this. Recipient The email address to receive the CC copy Example: manager@company.com Replace (Boolean Option) This controls how CC recipients are handled: False (Default) → Adds to existing CC list True → Replaces existing CC list Simple meaning: False = Add more CC recipients True = Replace previous CC recipients Real-Time Example Scenario: Customer raises a support ticket → email is sent to customer + manager Script Flow: Trigger: Email received Add Body: Response message ADDCCADDR: Add manager email Send Email Example Output: To: customer@email.comCC: manager@company.com Subject: Support Request Update Body: Hello, We have received your request.Our support team is reviewing it. Thank you,Support Team When Should You Use ADDCCADDR? Use ADDCCADDR when you want to: Notify managers about customer issues Send updates to multiple departments Include team members in communication Maintain transparency in workflows Track communication across teams Best Practices Use CC only when necessary (avoid clutter) Add relevant stakeholders only Keep recipient list clean Use Replace carefully Combine with ADDBODY for complete email automation Common Mistakes to Avoid Not using CreateEmail before ADDCCADDRUsing wrong email formatOverusing CC for too many peopleSetting Replace = True unintentionally ADDCCADDR vs ADDBCCADDR (Quick Difference) Feature ADDCCADDR ADDBCCADDR Visibility Visible to all Hidden from others Use Case Team transparency Confidential sharing Conclusion The ADDCCADDR action in NICE CXone Desktop Studio is essential for managing email communication in automated workflows. It helps you:Add multiple recipientsImprove communication visibilityAutomate team notifications If you are learning NICE CXone scripting, mastering ADDCCADDR is a must-VoipTrainers.

Mastering ADDCCADDR in NICE CXone Desktop Studio for Email Automation Read More »

Addbody in nice cxone desktop studio showing email automation workflow with trainer and students in classroom

ADDBODY in NICE CXone Desktop Studio – Complete Beginner Guide | Nice CXone Training VoIP Trainers

Introduction If you are searching for nice cxone training voiptrainers, this guide will help you understand ADDBODY In modern contact centers, email automation plays a critical role in improving customer communication and operational efficiency. Platforms like NICE CXone Desktop Studio provide powerful tools to automate email workflows. One of the most important actions in email scripting is ADDBODY. If you are new and wondering:What is ADDBODY?Why should I use it?How does it work in email automation? This guide explains everything in a simple and practical way. What is ADDBODY in NICE CXone? ADDBODY is an action used in email scripts to add content (text or HTML) to an email body. In simple terms:It helps you write the actual email message automatically inside a workflow. Lorem ipsum dolor sit amet, consectetur adipiscing elit. Ut elit tellus, luctus nec ullamcorper mattis, pulvinar dapibus leo. Why ADDBODY is Important How ADDBODY Works (Simple Explanation) Before using ADDBODY, you usually create an email structure using: CreateEmail action Then ADDBODY is used to insert the content into that email. Basic Flow: Create Email → (CreateEmail) Add Subject → (AddSubject) Add Body → (ADDBODY) Send Email → (SendEmail) Visual Workflow Example This type of workflow is commonly used in contact center automation systems. ADDBODY Input Properties Explained Let’s break down each property in a simple way: Caption A label for your action Helps identify it in the script Example: “Add Welcome Email Body” ContainerVar Stores the email data Default value: EML You usually don’t need to change this Text (Plain Text Version) Used when email client does not support HTML Example: Hello Customer,Thank you for contacting us. HTML (Rich Format Email) Used for formatted emails Supports: Colors Fonts Buttons Links Example: <h2>Welcome!</h2><p>Thank you for contacting our support team.</p> Replace (Boolean Option) This controls how the content is handled: False (Default) → Adds content (append) True → Replaces existing content Simple meaning: False = Add more text True = Overwrite existing text Lorem ipsum dolor sit amet, consectetur adipiscing elit. Ut elit tellus, luctus nec ullamcorper mattis, pulvinar dapibus leo. Real-Time Example (Beginner Friendly) Scenario: Customer submits a query → system sends automated reply Script Flow: Trigger: Email received Action: Process request ADDBODY: Add response message Send Email Example Output Email: Subject: Support Request ReceivedBody: Hello, We have received your request.Our team will contact you shortly. Thank you,Support Team When Should You Use ADDBODY in nice cxone desktop? Use ADDBODY when you want to: Send auto-reply emails Create support acknowledgments Build marketing emails Send transactional messages Customize email templates dynamically Conclusion The ADDBODY action in NICE CXone Desktop Studio is a fundamental part of email automation. It allows you to:Build structured email contentAutomate customer communicationImprove efficiency in contact centers If you are starting with NICE CXone scripting, mastering ADDBODY is one of the first steps toward becoming an expert – VoipTrainers.

ADDBODY in NICE CXone Desktop Studio – Complete Beginner Guide | Nice CXone Training VoIP Trainers Read More »

Nice CXone training VoIPTrainers in Chennai with students learning customer support software and trainer explaining CXone dashboard

Best NICE CXone Training in Chennai – VoIP Trainers Complete Guide

Introduction If you are looking for nice cxone training voiptrainers, you are in the right place. In today’s customer service industry, NICE CXone is one of the most powerful cloud-based platforms used by companies worldwide. VoIP Trainers provides the best NICE CXone training in Chennai with real-time projects and hands-on experience. What is NICE CXone? NICE CXone is a cloud-based customer experience platform that helps businesses manage: Call center operations Customer support Workforce optimization AI-based automation Learning NICE CXone can open doors to high-paying IT and BPO jobs. Why Choose VoIP Trainers for NICE CXone Training? Practical Training VoIP Trainers focuses on real-time scenarios instead of theory. Expert Trainers Training is provided by industry professionals with hands-on experience. Job Support You will get guidance for interviews and placement support. Flexible Learning Online and offline classes available. Course Modules Covered NICE CXone Overview ACD Configuration IVR Setup Call Routing Reporting & Analytics Workforce Management Who Can Join? Freshers BPO employees IT students Customer support professionals Career Opportunities After Training After completing nice cxone training, you can apply for roles like: CXone Administrator Contact Center Analyst Technical Support Engineer Why NICE CXone is in Demand? Many global companies use NICE CXone, so trained professionals are highly required. Conclusion If you want the best nice cxone training voiptrainers, choosing VoIP Trainers is the right decision. With practical exposure and expert guidance, you can build a strong career in customer experience technology.

Best NICE CXone Training in Chennai – VoIP Trainers Complete Guide Read More »

ADDBCCADDR in NICE CXone Desktop Studio email automation workflow with BCC recipients

Looking for the Best NICE CXone Training? Start Here

Introduction If you’ve been searching for “NICE CXone training” or trying to understand how to master Desktop Studio actions, you’re in the right place. I’ve started sharing practical, easy-to-understand breakdowns of key concepts—and today’s focus is a powerful email automation action: ADDBCCADDR in NICE CXone Desktop Studio. ADDBCCADDR in NICE CXone Desktop Studio – Explained Clearly When working with email scripts in NICE CXone Desktop Studio, managing recipients effectively is crucial. The ADDBCCADDR in NICE CXone Desktop Studio action helps you add Blind Carbon Copy (BCC) recipients to your emails—ensuring visibility for stakeholders while maintaining privacy. Why This Matters in Real Projects In customer experience workflows, you often need to: Notify internal teams silently Keep audit or compliance teams informed Avoid exposing recipient lists That’s exactly where ADDBCCADDR in NICE CXone Desktop Studio becomes essential. Core Components You Should Know: Caption Give your action a meaningful name so it’s easy to identify in complex scripts. ContainerVar (Default: EML) This holds your structured email object created using the CreateEmail action. Recipient The BCC email address you want to include. Replace Option False → Adds to existing BCC list (most common use) True → Replaces all existing BCC recipients Multiple BCC Recipients? No Problem You can use multiple ADDBCCADDR in NICE CXone Desktop Studio actions in a single script to dynamically build your BCC list based on conditions. Execution Flow The action follows the Default branch unless you define alternative conditions—keeping your workflow simple and predictable. Real-World Use Case Example: Imagine sending a customer confirmation email while silently notifying your QA or escalation team—ADDBCCADDR handles this seamlessly. Follow along if you’re serious about mastering CXone and building smarter automation workflows. Learn more about NICE CXone Practical Training at VoipTrainers. 

Looking for the Best NICE CXone Training? Start Here Read More »